
How To Draw The Wind. There’s nothing quite like a nice breeze blowing your way on a hot day. We have all experienced the wind at one time or another, but not everyone may know what makes the wind act the way it does. We probably won’t go into those explanations here, but if you want to know how to draw the wind, you’ve come to the right place!
The wind can sometimes be mysterious, but it is not necessary to know how to draw it. We hope this step-by-step guide to drawing wind helps you recreate that natural force. You can draw many more characters like drawing ideas cute, Anubis drawing, cat drawing, cobra drawing, blueberry drawing, coconut drawing and many more drawing for kids.
Step 1:
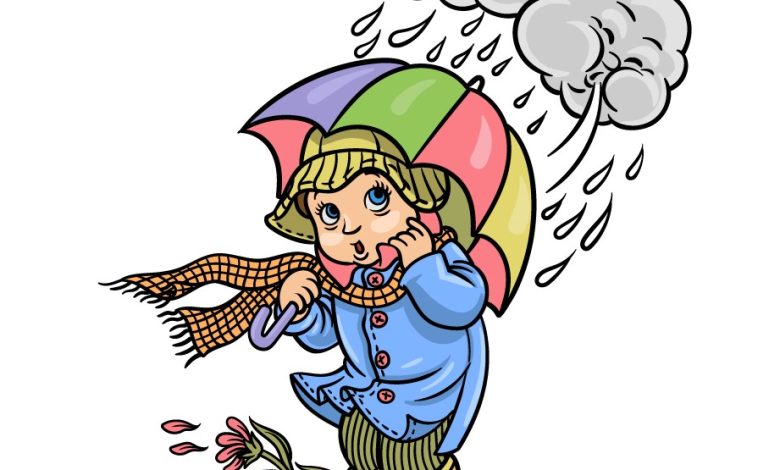
We have a nice scene that we will draw in this guide on how to draw wind! In this guide, we will draw a boy in a raincoat pushed by a strong gust of wind and start with the boy’s face. Start with two circles for the eyes, then add some pupils and eyelashes. You can then use a few simple lines for the nose and mouth, and then you can finish with the outline of the face and the brim of the hat they are wearing.
Step 2:
This part of your wind drawing will make you add something more to the boy the wind is blowing on. Use curved lines for the arm of the coat, then draw their hand holding the coat collar. Finally, draw some line details on the hat you use for this step. There will be a gap at the top of the hat, as we will soon draw an umbrella covering this area.
Step 3:
We will continue to add some details to the boy in this step of our guide on how to draw the wind. Use curved lines starting from the tip of the umbrella to draw the different segments of the umbrella. Then draw the shape of the hand on the other arm that holds the umbrella’s handle. Finally, you can draw this handle with more curved lines.
Step 4:
In this part of your wind drawing, all you have to do is draw wavy lines to form the shapes of the scarf blowing around the boy’s neck. Then you can use a grid pattern to create a checkered look for the scarf. Finally, finish by drawing the sleeve of the second arm and then draw a line for the boy’s chest.
Step 5:
In this step of our wind drawing guide, you will draw the rain cloud that causes the gust of wind. Before doing this, you can first draw the lower half of the boy’s raincoat. It will blow in the wind and have round button details and stitch lines. Next, it will be time to draw the cloud. Use lots of connecting jagged lines to create the outline of this cloud; then, you can draw a face on the cloud for a fun touch. Finish this step by drawing lots of raindrops from the cloud toward the boy. Don’t forget to draw a gust of wind coming from the cloud!
Step 6:
The boy in his wind drawing is dressed in full rain gear, and we’ll end up drawing him with rain boots. Use curved lines for the outlines of the legs, then add striped details inside. Finally, draw the boots under the pants and add some triangular details on edge. Then you’re ready to add some final details in the next step, so let’s continue!
Step 7:
Before coloring this picture, we will add some final details in this step of our guide to drawing the wind. Use rounded lines to create a muddy base for the boy, then draw a flower waving in the wind to finish it off. Be sure to add all the fun details you like to the image before moving on to the final step!
Step 8:
This is the last step in your wind drawing; in this one, you can spice it up with fantastic colors. In our reference image, we tried to use as many bright colors as possible for the image. We did this by adding some nice bright colors to the segments of the umbrella and the clothes the boy was wearing. You can use this reference as a guide if you like these colors, but you should also feel free to use any color you want. Once you’ve decided on the colors you want, you should also experiment and have fun with the art mediums you use to bring the colors to life.
Five tips to make your wind drawing even better!
Make excellent works of art by showing you five tricks to improve your wind sketch! The design we created for this wind drawing is fun, but you can customize it further. An excellent place to start would be with the character. For example, you might want them to be more like you or You can do this even if you stick to the same style we use. What other details could you customize? Speaking of styles, you might want to try another one for this wind drawing. One idea would be to make the drawing simpler and more cartoonish. You power prefer to make it even better, exact, and honest! It all depends on your preferences, so what styles would you like to wear?
You could incorporate some crafts if you wanted to give your design a new element. An example would be to use cotton and then stick it on the cloud. You can apply gray paint to the cotton to make it look even stormier! Accomplish being shocked to play with fun instruments and skills. Counting a location would be another fantastic form to improve your current drawing. We’re drawing the beginnings of a background in this guide, but you can add a lot more. Adding a background and more details can make it even more of a scene!
What are some great background details you could add? Once you have decided on the styles and extras you want for this wind drawing, you might have creative colors. We have created a charming and classic look for our example. This could be recreated using softer mediums like watercolors and colored pencils. For more vibrant colors, colored pens and markers would be the way to go. Again, it all depends on your preference! What colors and mediums do you want?