How to Perform Exchange Migration 2010 to 2016 Without Any Issue?
Exchange 2010 version reached its end on October 2020. This is why most organizations look forward to performing Exchange migration 2010 to 2016 manually or professionally. We all know that Microsoft ended the technical support for Exchange 2010, and no one wants to take risks for their data. Working on a technical without technical support may be risky. Microsoft doesn’t provide technical support for any mishaps users face while working on Exchange 2010. As a result, moving to the latest version would be a better and safe option for users. This blog will discuss the solutions to accomplish this migration. Scroll this blog until the end for a better understanding of the ways to perform this Exchange migration.
Why Do Organizations Move to Exchange 2016?
- Exchange 2016 has introduced better features and reliability than previous versions.
- It added multiple language support in Outlook web. Users can use 17 languages.
- The calendar feature has improved than previous ones.
- Improved search option in Outlook. Users also get improved emailing features as well as a cloud approach.
Solutions to upgrade/migrate Microsoft Exchange 2010 to 2016
Exchange migration can be completed manually and professionally. The migration from Exchange 2003 and 2007 cannot be possible directly to Exchange 2016. But users can perform the Exchange migration 2010 to 2016 by moving manually. Let’s begin the solutions with the manual method.
Migrate MS Exchange 2010 to 2016 using the manual approach
We recommend you fulfill all the hardware requirements before going through the steps. Also, check your operating system compatibility with the mailing platform.
Step1: Open the Exchange Admin Center (EAC) and log in.
Step2: Go to the Recipients and select Migration.
Step3: Click on Add option, and choose the Move to a different database option.
Step4: Select the mailboxes to move into Exchange 2016. Click Next.
Step5: Enter the New migration batch name and browse the target database location. Click Next after making changes of your choice.
Step6: Select the user to receive the notification of the migration report after completing the migration.
- Choose the options to start and complete the migration batch and Click New.
Step7: The migration process will run after completing the above steps.
These are all the steps that you must follow to implement the manual method. But users can face difficulty while performing the Exchange migration 2010 to 2016 manually.
Shortcomings of the manual method in migrating Exchange data
- Consumes maximum time in completing Exchange migration.
- Novice users may face challenges with the manual method.
- A single error can lead to the chances of data corruption.
- Users can’t resume or pause the process once it gets started.
- No advanced features are available to ease the Exchange migration 2010 to 2016 process.
Moving with the manual method might be complex, so users can use the professional third-party tool to eliminate the manual approach difficulties.
Shoviv third-party tool to do the Exchange migration
Everyone desires a professional to migrate Exchange all data to another version easily. So, Shoviv has introduced advanced automation named as Shoviv Exchange Migration Tool. This software effectively performs the Exchange migration 2010 to 2016 without any concern. Moreover, it offers a lot of features that smoothly perform the migration process. Even the users also get good working experience with this software. The software has a simple user interface that allows all users to perform this task without difficulty. Even novice users can efficiently perform this task with this tool. This software safely and quickly performs the Exchange migration 2010 to 2016 task. Users can easily migrate the Exchange data to another version by following some simple steps. Below we described the features of the Exchange Migration Tool.
- Users can select multiple mailboxes at a time and process them in a single.
- The filter option allows users to migrate items per their desires. Users can add or remove items using its filter option.
- Moreover, it performs the Exchange migration 2010 to 2016 without making changes in the folder hierarchy and data integrity.
- Users can recover the public and private corrupted EDB files along with the migration.
- It offers various file formats to save EDB files, such as HTML, EML, RTF, vCard, etc.
- In addition, users can migrate the Exchange-specific folder into another Exchange-specific folder.
- Users can easily move the Exchange mailboxes directly into the Live Exchange Server.
- This software provides a preview of the selected items before initiating the Exchange migration 2010 to 2016 processes.
- It allows users to process mailboxes without size limitations.
- Furthermore, it gives the option to export the Exchange data into Office 365 without any trouble.
- The search option of this tool works very fast. Users can find the needed items in a while using the Shoviv software.
- Additionally, users can migrate the Exchange mailboxes directly into Outlook PST.
It also offers an incremental option to resume the process next to where it last paused. Moreover, this option easily prevents the target items from duplicity. After completing the process, it creates a report of the whole process. This report contains the detail of the whole process, like failed items, filtered items, migrated items, etc. Now begin the Exchange migration 2010 to 2016 process using the Shoviv software.
Simple steps to migrate Exchange data using Shoviv automation
Download and install the Shoviv Exchange Migration Tool.exe (aka Shoviv Exchange Recovery Manager). Then, follow the below-discussed steps to accomplish this migration task quickly.
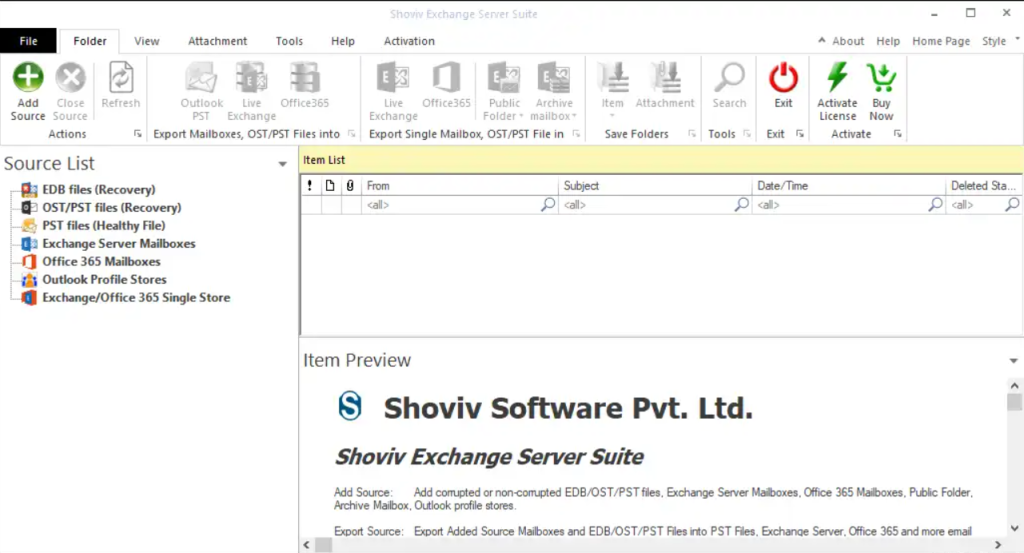
Step1: Successfully installing the software opens it. Click add source from the ribbon bar.
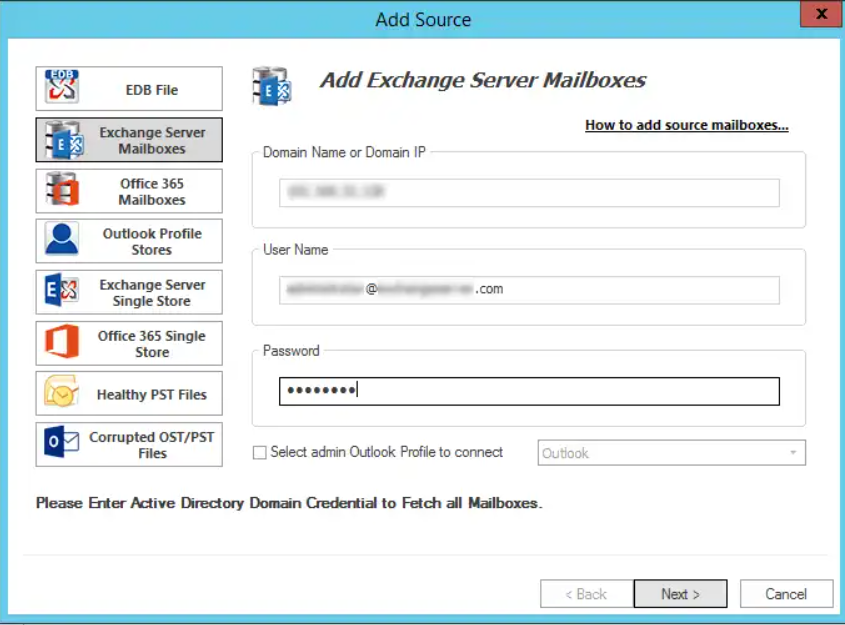
Step2: Select the Exchange Server mailboxes option and click next after providing the required details.
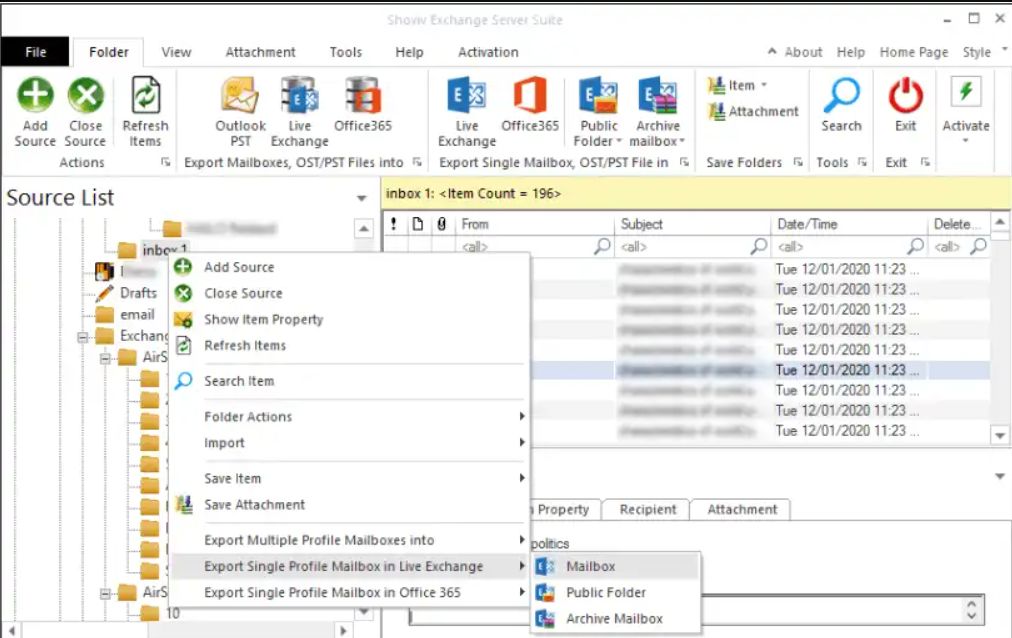
Step3: Right-click on the added mailboxes list and choose the Export Single Profile Mailbox in Live Exchange. Then select one option from the mailbox, public folder or archive mailbox.
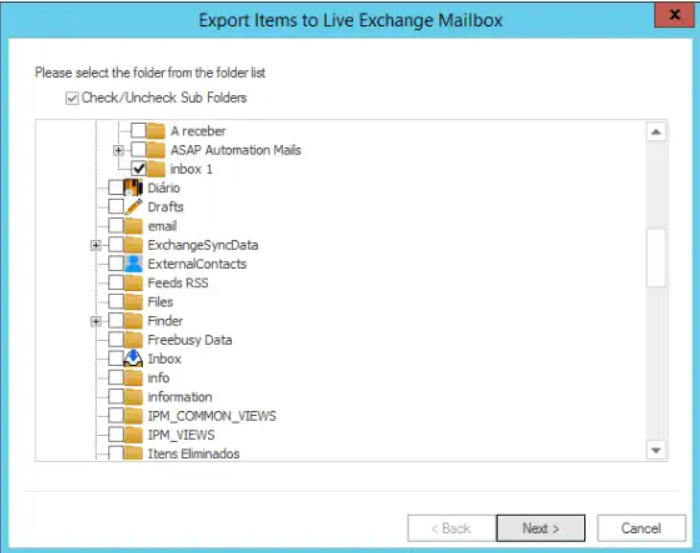
Step4: Check/uncheck the subfolders from the list and click Next.
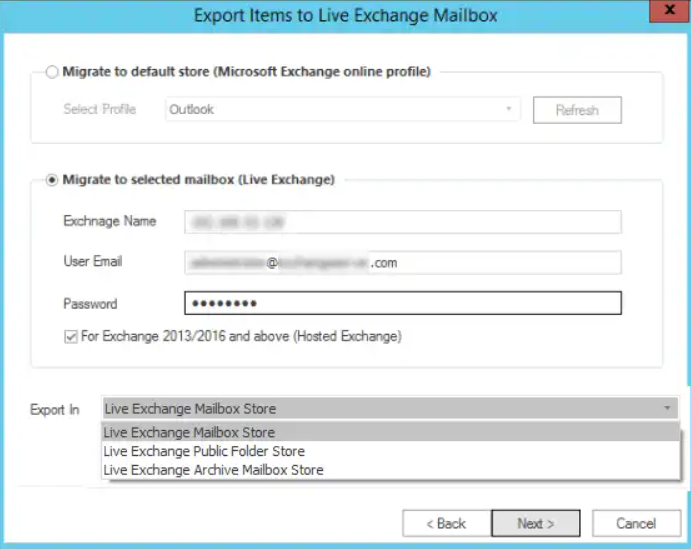
Step5: Now provide the details of the target Live Exchange. Click Next after choosing the destination from the Export In.
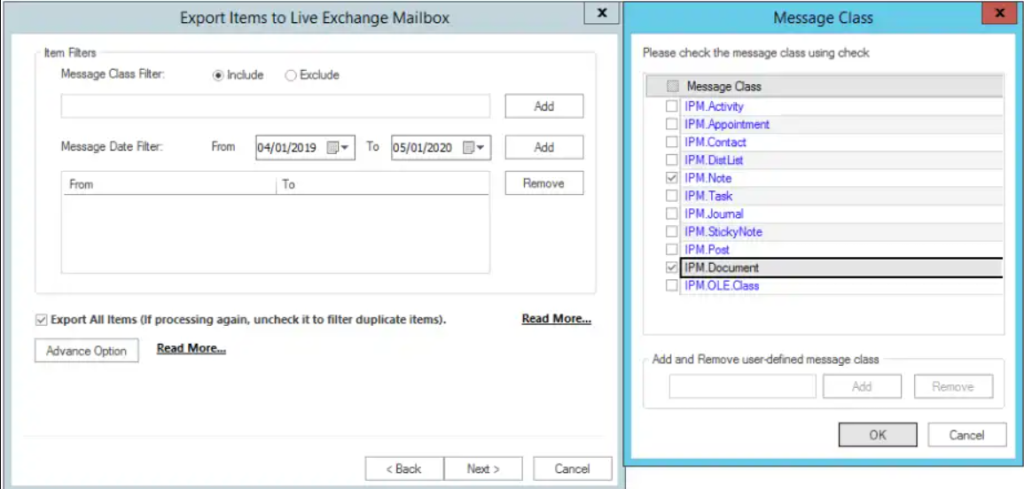
Step6:
- Filter items per your requirements using the date or folder-wise criteria.
- Check the Export all items (If processing again, uncheck it to filter duplicate items).
- Click on the Next button.
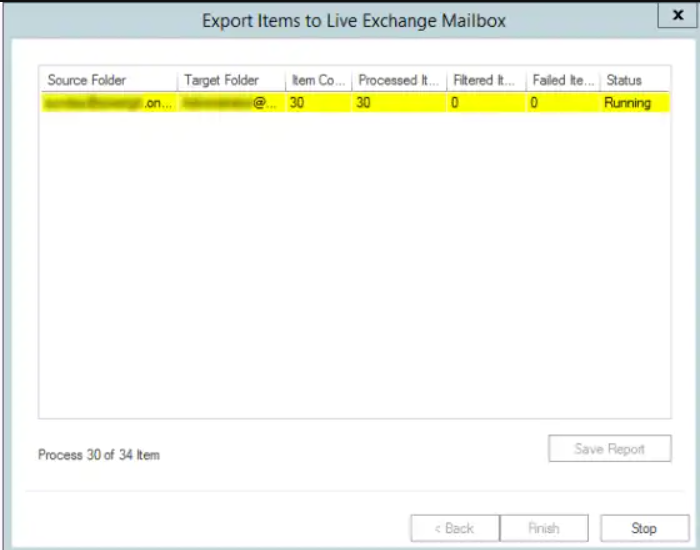
Step7: The Exchange migration 2010 to 2016 process will run. Save the process report if needed and click Finish after completing the migration process.
These are some simple steps that everyone can easily use to do this migration task. Shoviv offers a free demo version of this software that users can try to check more features. Moreover, users can process the first 50 items per folder without any concern in this free demo version. Shoviv also provides technical support to its users related to any query.
Wrapping Up
In this blog, we discussed the manual and Shoviv professional methods. Here now, we can easily conclude that Shoviv Exchange Migration Tool is the easiest and safest way to perform Exchange migration 2010 to 2016. Users can easily add Exchange mailboxes as well as EDB files in this software. With the migration, it also performs more tasks. Even users can recover damaged EDB files using this software. It all depends on the user’s understanding of which method they want to implement in performing this task. So, we suggest you try its free demo version before making any conclusion.


