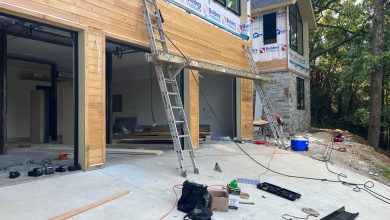
Fencing not only provides privacy for your home. It also enhances the aesthetic value. Therefore, it is vital to consider the material you use to avoid destroying the exterior design. According to research, the cost of the installation of a privacy fence ranges between $1,788 and $6.961. On average, you would have to spend about $$4,735 to have a privacy fence installed.
Privacy fencing protects your home from prying eyes and outside distractions. Fence installation depends on the size of your back or front yard and the material you want to use.
Steps to Take During Privacy Fence Installation
Now, you have a few options when it comes to fencing. Your budget and preferences play a huge role in the choice of material. You can choose either:
- Exotic woods
- Vinyl
- Bamboo Panels
- Brick fences
If you want to put up a wooden privacy fence, here are the basic steps to follow:
Step 1 – Check Neighborhood Rules
Residential areas have different rules on fence installation. Before building any fence, ensure you are conversant with community rules.
Unauthorized fences could lead to fines and tearing down of the fence. Consult your neighbor if your fence will touch on a shared property line.
Additionally, check city codes to establish if you need any permits to build your privacy fence.
Step 2 – Choose Your Material
Since we are going with a wooden fence, you have multiple wood options, including:
- Cedar
- Common redwood
- Heart redwood
- Dogeared redwood
- Dogeared cedar
- Pre-fab redwood panels
Step 3 – Find Post Locations
Determine the fence perimeter and mark using strings tied to stakes. The distance from one post to the next is up to you. However, standard measurements are eight feet (from center to center).
When you establish post positioning, dig the post holes using a motorized auger or manual digger. The post hole should be 16 to 24 inches deep.
Step 4 – Place Gravel
A few inches of gravel during fence installation are vital. The layer of gravel prevents the wood posts from rotting and provides drainage. You don’t want water building up at the base of your posts because that encourages rotting.
Step 5 – Place Your Posts
You will need a helping hand during pole placement. Ensure the poles are similar in height. If there are some longer posts, cut off the tops after the posts have set for at least 24 hours. Once you are comfortable with the height, seal the post tops to prevent rainwater damage.
Step 6 – Pour Concrete
Concrete seals everything. Therefore, ensure your pole is straight and the height is perfect. Mix the concrete with water in the ratio recommended by the manufacturer. Use a level regularly to ensure it stays straight.
Step 7 – Set the Posts
It will take approximately a day for the posts to set. For reinforcement, use temporary cross bracing, which holds the posts in place.
Step 8 – Measure and Cut the Rails
Rails are the boards placed perpendicularly between the posts. Usually, two to three rails do the job. However, consider the height of your fence when creating your rail frame and attaching it.
Step 9 – Add in the Outside and Inside Slats
Nail or screw the slats or pickets to the rails, ensuring even spacing. Once you finish with the outside pickets, add in the inside slats, covering any spaces left.
Step 10 – Add a Gate
At this point, your privacy fence is looking good. Add a gate (if you wish) for entry into your yard or compound.
When installing a privacy fence around your house, you need the best supplier of top-notch quality materials. If you construct a privacy fence with cheap materials, it won’t hold up long enough. Moreover, you need the fence to look good and maintain security, which requires quality materials


