Install Nest Outdoor Camera
As crucial as it is to safeguard the interior of your home, the most important thing is to protect the outside from intrusions. Also, Nest outdoor cameras can aid you in that process. Simple to install and operate to start video surveillance with cameras from Nest cameras in no time. If you’ve got a brand newly installed Nest outdoor camera that you have at home, understanding the process of setting it up is crucial. This blog will guide you through the steps needed to set up the settings of your Nest Outdoor Camera in under minutes. you can also do easily the nest camera login after the installation.
Make sure you power up your Nest Camera
Before mounting and installing it on your Nest camera outdoors, turn off your Nest camera indoors so you are able to set it all up properly.
Attach your Nest camera’s USB cables to the power adapter by using the USB cable that comes with the packaging.
Plug the adapter into the outlet. The power source will be switched on. It will be powered on. The next camera will turn on, and you’ll see the light orange.
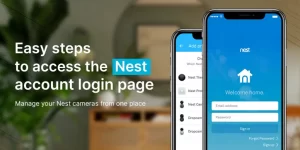
The last step in setting up to install the Nest outdoor camera is downloading the Nest Home application. It’s installed on the smartphone. Once it’s installed, open the app, and then sign up for your personal Nest account. Choose the Sign-up button on the screen you’ll be able to see.
Click the Add button to choose Nest camera. Follow the steps to connect it to your account.
If you have a Nest login, simply click the Settings icon located in the upper right corner, and then press “Add Products” to join the camera.
Installing Nest outdoor camera outdoors
Attach it to the outlet that you want to use and wait for the green indicator light to appear. It will then join it’s WiFi network. The camera will then connect directly to the WiFi network seamlessly. It could take a few minutes.
The camera needs to place on the spot where you’ll position it, and make sure that it is streaming video to the Nest app. In the event that streaming isn’t functioning and the resolution of the stream isn’t enough then you’ll need to find another location or move the WiFi connection to a different location.
After you’ve decided on the location for the camera You are now able to connect the camera with ease.
Mount your Nest Outdoor Camera
Begin by attaching the wall plate to the wall using screws and an electric screwdriver. Determine the areas where you’ll drill pilot holes in order to ease installation. If you’re building brick walls, you’re looking to install wall anchors to hold the screws. Install the wall plate with screws and be sure that it’s solid.
Then, place your magnet in the frame.
Then, put Then, place the Nest outdoor camera on the magnetic mount and adjust the camera to your preference. You can make use of the video stream inside the app called Nest App to alter the angle and orientation that the camera is in.
The next step is that you’ll be required to set up the power adapter. Before doing that, it’s advisable to figure out the route that the power cord will take. It is important to leave a bit of space between both ends. You may want to consider installing an adapter that is weatherproof to 18 inches higher than the surface in order to shield against the damage caused by flooding and snow.
It is the next thing to do: attach the adapter’s wall mount to the wall. After that, you can fix the power adapter in the proper position.
Connect your cable to the wall using the clips supplied inside the package. It is possible to route the cable along an edge or paint it with the same hue as the walls. Make sure you leave the cable unattended should you decide to change how your camera is positioned in the near future.
Installation of Nest Outdoor Camera can be simple and the instructions provided below will allow you to complete the task in a quick way.